

I'm pretty excited to put up my first tutorial! I wanted to make something to share that is very easy to make, as well as being irreisitably cute.
The design of the garment is pretty much for young girls, however by altering the length of material used, it is very easy to make one for yourself even!
Please don't be put off by the idea of shirring, as it is much easier than it looks and even more so, rewarding! Being my first tutorial, I'm hoping that I took enough pictures. However, if you are not certain about a particular instruction, let me know!
Okay, here goes....
You will need:
1 metre of Fabric
Cotton Thread
Elastic Thread
Scissors
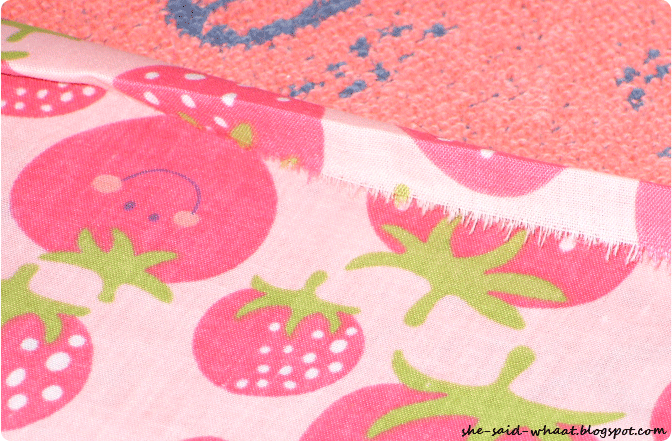
Start off with your length of fabric. This tutorial uses 1 metre of fabric. If you vary the length of the fabric you can make a larger or smaller size. I used my cutting board and ruler to determine the length of the finished dress. Don't forget to factor in a seam allowance! My dress is 47.5cms, or 19ins, and the seam allowance is 3cms (1.5 cm at the top and the bottom).

Press your seam allowance in the fabric by folding up 1.5cms and pressing along the length, and then a further 1.5cms again, to enclose the raw edge of the fabric.
When choosing the colour of the thread that you use, a really neat trick to match the shade is to unravel a small section of thread and hold it up against the fabric. It helps you to see a lot easier too see if it will 'disappear' into the fabric!

Sew down the hem at the top and bottom of your fabric. Sew as close as possible to the turned under edge to ensure the hem will lie as flat as possible. When sewing, use a medium-length stitch. You don't need it too long for the hems, I set my machine to a stitch length of 3.

For the next part, I don't have a picture detailing, but for your shirring, you will need to change your bobbin from regular thread, to elastic thread. It is most useful to use multiple bobbins, so you don't need to mess around with winding/unwinding one! To thread your elastic thread onto the bobbin, you will need to do it by hand. Don't cause the elastic to stretch out as you wind, but rather keep it without tension. Place your bobbin into your machine as you usually would, and set your stitch length to it's longest (mine was at 4).
Starting at the top left of the fabric length, don't forget to sew a few backstitches before you sew down the entire length. This will ensure that your elastic will not come loose. Use markings on your sewing machine foot to help guide you with keeping the distance between each row of stitches consistent. Here, I've used the line where the plastic and the metal parts meet. When you get to the end of the row, again don't forget to backstitch to secure the elastic!!

This is what you will start to see after you've done your first row.

Continue doing rows for the bodice of the dress. On my completed garment, I completed 10 rows of shirring which I decided that was enough. You can do more or even less if you choose too. As I progressed with my shirring rows, I used the distance between the needle and the right of the foot to keep my rows a consisent distance apart. However, don't fret if you aren't completely straight! It won't be so noticeable in the completed garment (phew!).
As you sew, stretch out the fabric with your hands as you go -- don't just allow it to stay gathered up. This will make for a much neater final appearance. An important thing to remember is that you are not forcing the fabric through, but rather guiding it.

Once you've completed your rows of stitching, it is time to switch back to your regular threaded bobbin (you're finished with the elastic now!) and sew up your back seam. Pin the right sides of the fabric together, and sew with the medium stitch length you used when doing the hems. I have used a wider seam allowance here, to ensure that my ends of the elastic are secured within the seam. You can adjust yours accordingly to ensure the same is true for yourself.
Press your seam allowance open, and finish in your way of choosing. You can leave the edges raw if the fabric will allow; otherwise I would recommend doing a French seam, or using an overlocker.

Next up is the straps! You can omit the following steps if you choose to make a strapless garment. Cut your fabric into strips 5cms wide, the length is up to you as to how long you wish them to be. I like the cute appearance of straps that are adjustable and tie into bows. To achieve this, I made 4 straps each 15cms in length.
This image shows how you will need to press your fabric. First press a 0.5cm seam allowance at either end of the fabric length. Go to your sewing machine and secure with the medium stitch. It is not necessary to back stitch at this step as the edges will be enclosed within the straps.


Then, fold the two outer lengths in to meet at the middle of the strap, and press. If you are finding it tricky to meet equally in the middle, first fold the fabric in half and press-- that way you have a crease in the middle of the fabric.
Fold the two halves onto one another so that now all raw edges are enclosed. Using your medium stitch length, sew close to the edge to secure the straps.

Pin your four straps evenly onto your bodice. Secure them well with your stitches. I chose to put the first seam going over the first row of stitching, and then closer to to top of the dress- remembering to do the back stitching.

To finish, turn your dress in the right way and blast the shirring with steam from your iron. This will cause the fabric to shrink in nicely.
And you're done! Other ways you can jazz up your creation is to put large buttons where the straps sit at the front and back. You can play around with your design to put that 'made by ME' touch to it. Then dress up your favourite girl! Great little outfit for the warmer weather, and the dress grows with them! It can be a top for a young girl, and again if you use a longer length of fabric, even do one for yourself! I know I will.... Yay :D
I really hope you enjoyed the tutorial, please tell me if you find anything confusing or if you have any questions at all! I've had fun putting the tutorial together, and I'd love to see anything you might make with it!
Cheers!

No comments:
Post a Comment
Thank you! Ask, comment, share the love...!