Monday, January 28, 2013

Preparing Dany's Qarth Dress Fabric

As the title of the post pretty much sums up, here is a post to break down the elements of what was done to my fabric before my dress was put together...

Lightening the Fabric:

I have posted about it before here, but again here is a quick recap of what I did to the fabric that I purchased from The Oxford Street Cloth Shop: I put the 6 meters of fabric into my front loader washing machine with two packages of RIT Dye Remover at 60°C. As the fabric was silk chiffon with metallic thread (and expensive at that!) I did not want to ruin the fabric. At the same time, I knew I had to take the plunge and do what had to be done, and find out the consequences later!

You may recall I have previously stated that the fabric I used was the same as the one used in the show. The caveat was that the fabric for the show was lightened, hence my research of the above on how to lighten this particular type of fabric. The good news is that if you use different fabric, the above steps to lighten would not be necessary!


Painting the Fabric:

Funnily enough, I was sure I'd taken more photos whilst I was printing my fabric. I was probably paranoid about getting paint on my camera.
I'm fairly certain that the pictures speak pretty loudly themselves about how things went down. But to break it down for you....


I decided to cut my fabric first, and then print the gold on it. My dress is constructed from four pieces of fabric.


I used sea-sponges to print on the gold paint. I alternated between these two pictured, to give variety in the printing. Each sponge is approximately the size of my hand. I made sure to have a fabric covering to protect the table beneath. Thanks to my bestie Corinna for letting me do this in her backyard!

Apparently the fabric paint I used will set permanently once it is ironed in a particular way, but I decided to not do this (guilty as charged!) because 1: I was running low on time and 2: I wasn't sure how well I would go with expensive silk chiffon and my iron! The paint and sea sponges were both purchased from a local arts supply store, Jackson's.


Pleating the Fabric:

In the show, the fabric of the dress has very structured pleating. I decided that due to time restraints and not having done anything similar before to not include pleating in my design.
I do pleat the fabric where it meets the shoulder pieces, but I did not worry that it was not a feature that continued to the hem of the finished dress.
From washing the fabric in my machine, it left a wrinkled effect on the fabric. I actually thought that it would work just fine this way, and therefore did not pleat the fabric; that is the end result you see in my dress.


If you have any questions about the above, please don't hesitate to ask and I'd be happy to help where I can. Things might get a little hectic at home, as we are moving from our unit to a house! Just a little bit exciting :D It's felt a bit like a drawn-out process, but it will be worth it in the end. I'm excited to have more room for my girl-cave! :D But I hope to see you soon!


Tuesday, January 22, 2013

Daenerys Costume Reference Pictures

Welcome back to my series on how I have created my Daenerys' Qarth gown.

As a part of my costume-creating process, reference images are essential. I love to pour over screen captures and other costumers interpretations of the outfit I wish to create.

I save images like mad, and regretfully I don't always remember where I've sourced my pictures from. I'm sharing the pictures that I think best illustrate the construction of her dress. Whilst I cannot cite every website I gained them from (I'm sorry! :() I do know that a lot of them are from Adoring Emilia Clarke. So here we have in no particular order:


Note how the shoulder pieces are attached! In my costume I have pleated the top of the fabric, sewn a seam, and folded the raw edge under. From here I hand stitched the fabric to the shoulder pieces. 


Here you can see the back of the cape ends in a vee shape. Dany's hair hides this feature mostly on her dress. I achieved this effect but cutting down the middle of my fabric and creating a rolled hem to the raw edges. I then ensured to sew this into a sharp point with my machine.


Another back of the dress shot. Luckily Daenerys wasn't embarrassed about other women wearing the same dress!


Here you can see how the cape is attached into the dress, and not flowing completely free.


Let's take a closer look! Here the cape attaches into the dress approximately 2 inches below the belt. Mine is sewn into the skirt seams with a French seam.


How very helpful of her handmaiden to hold up the dress for us! Sorry, not sure where I got this image from but it is compiled from screen-captures in the show.


And finally, here you can see how the gown has a bit of a train on it. I am fairly certain though that the dress in this photoshoot is different from the one she wears in the show. It seems to pool more around her feet in the show, whereas here it is floor-length with a train. I created the dress how I preferred to wear it (ie not wanting to trip!)


And so there you have it, some pictures and a bit of information that I can provide about my thought process surrounding them. I hope this has been able to help! Additionally, I hope to put up some more posts soon for the creation of the dress elements. Thank goodness for a long weekend this week hehe :D

Thanks for reading!


Wednesday, January 16, 2013

Rainbow Buttefly Cake DIY & Tutorial

So, mid last year I got married! The theme I worked with was 'Rainbow Butterfly Garden', and I had my heart set on a cake with cascading rainbow butterflies!

I believe of course that a picture speaks a thousand words, and the photo below is my husband and I cutting our butterfly wedding cake.


My determination was to have this style of wedding cake, which the Internet told me sky-rocketed to fame thanks to Martha Stewart. The thing that got me was why pay the price tag when I could DIY the cake decorations myself with the help of my family? This post is the result of those lofty dreams!

Read on if you want to find out how you can make your own, with a FREE DOWNLOAD (made by me) of the butterflies I used!


You will need:

  • Butterfly transparency sheets (Download the files here! They were created as A4 page size)
  • Scissors
  • Clear sticky tape
  • Wire (best to use cake-decorating wire, but out of desperation I used florist wire)
  • Wire cutters


Background Info about Tutorial:

My first step was to source freeware butterfly outlines online. It took a bit of searching to ensure the ones used were not copyrighted and available to use, but it was important to me that this was so.


I used Photoshop to colour the butterflies in tones that I felt were complimentary to my wedding colours and to one another. Basically each sheet is comprised of 11 butterflies in the colour of choice, as illustrated below. In my downloadable I have included, all of the butterflies are are the colours below and have the black outlines but the rest of the page (ie not the butterlies) is transparent, not solid black (I'm not sure why but Blogger does not seem to like .PNG image files).


Save the file to a USB, and take it to your local Office Works (or similar outlet) and have the images printed on transparent film, which is basically the overhead projection sheets.


How to Proceed:


This is where the fun begins! Each butterfly will need to be cut out by hand, as neatly as possible. If you can recruit as many family members as possible that would be great! Luckily for me, my mother rose to the occasion and cut them all out herself! (Thanks Mum ;-))

Each butterfly will then need wire attached to it. I used florist wire because the cake wire I ordered online never arrived in time :( It worked though! Mine was green, but white would have blended in more beautifully with a white cake. The wire was about 7" long, and each one was cut in half.

Make an 'L' shape with the wire (approximately 1/2"), and attach it with a piece of invisible sticky tape to your butterfly. Of course, use the 1/2" to attach to the butterfly, so hopefully you should not see it when looking at the butterfly.

My mother stuck each wire as she completed it into a styrofoam cube, for easy and safe transportation.

The next challenge is then to decorate the cake! Because everything was crazy leading into the ceremony, I had no idea who in the end decorated the cake; but I found out it was in the staff in the kitchen of our wedding venue. How great was that?! I had this silly idea that I would be able to decorate the cake myself... But honestly this was a tad unrealistic.

Because I was trying to keep costs down, the cake that we chose from the bakery was not decorated. It was a chocolate and white chocolate layer cake from The Cheesecake Shop, with double icing. They could have added ribbon or flowers at an additional cost but it was much cheaper without... And they were not able to decorate any cakes with items that were not apart of their inventory.

Trust your instincts with how to decorate with the butterflies, but to prepare I printed an inspiration picture from online and made sure it was kept with the butterflies so that the lucky decorator of the cake would understand my vision!

The trick would be to ensure they are spaced out appropriately for the size of your cake, and inserted into the cake at various depths. There is actually a really great YouTube tutorial that shows you how to decorate, so I'd highly recommend that if you're planning this cake.

So sorry that I don't have any pictures of the process, but I wasn't running around with a camera on the day, as I'm sure you would understand! I hesitate to use the pictures of others, because many online images are from stores that are selling their wares. There are some really great ones out there for those who would love the butterflies, but are not as interested in completing the above process! But any Google Images Search will give you such wonderful inspiration!

Here is a picture though of the Martha Stewart magazine cover that seemed to start it all!

I hope that these instructions help you, and there is no doubt that there is many opportunities to brighten up a cake with these butterflies, not just a wedding! If you have any questions at all about the process, please don't hesitate to ask!

I would really love to hear what you think of this post, so I would love it if you could leave a comment! I worked very diligently on these butterflies for my own use, and am excited to share my files with you!

And of course I would LOVE to know if you use my download for your cakes, so please be sure and let me know if you do...


Sunday, January 13, 2013

Easy Stash Busting Bows Tutorial


Yesterday, I was preparing a quick swimsuit costume which required the use of 4 golden bows. I was really happy with my results, as it was done in a very quick and slap-dash way yet yielded a very pretty result. Today, I made a few more and decided to make a tutorial to share with you. They are very easy to create and I will warn you they are addictive.

All you need is a sewing machine, scissors, fabric and matching (or not!) thread.

1.

Step 1 - is to cut your bow fabric. I did mine just by eye-balling the length I wanted, but to be more precise the above is 24cm x 23.5cm (9.6in x 9.4in). Basically a square. I would not be concerned if your dimensions differed too much to the above. If you are not comfortable 'just winging it', make yourself a paper pattern to follow.

2.

Step 2 - is to cut the fabric for the centre of your bow. The above scrap of fabric is 5.5cm x 23.5cm (2.2in x 9.4in). You can vary your width, and we will not be using the full length, but you will need at least half the length of above to create one bow centre.


3.

Step 3 - will to be for you to sew a straight seam for the fabric of your bow, and the centre of the bow. Mine uses a stitch length of 3, and I've left a very narrow seam allowance and neatened it to approx 5mm. Turn both pieces so the fabric is the right-way out.


4.

Step 4 - shows you where you should position your middle seam

5.


Step 5 - sew a 5mm seam and trim to neaten. Ensure that the seam we sewed in step 3 is visible on the outside, as per the image above.

6.


Step 6 - Turn your bow fabric so all your seams are on the inside. Position the seam from step 5 into the centre of the bow.


7.

Step 7 - Wrap the centre of the bow with the seam facing outside around the middle of your fabric square.  I would recommend at looking at what will be the front of your bow to see how well the folds are sitting, as opposed to focusing on how the back of the bow will look.

Ideally here you will switch to a zipper foot to allow you to sew as close as possible to the bow, without catching any part of the bow in the needle. Trim the seam allowance to approx 3mm.


8.


Step 8 - Turn the fabric of the centre of the bow so that the seam is now concealed on the inside.


9.

Step 9 is the bestest step of all-- Admire your handiwork! It is also appropriate at this time to straighten the centre of the bow so that it is sitting well... In the centre of your bow!


Here is an assortment of different bows I have created using this method. For the tulle bow, I played around with the amount of fabric that was used. It was made slightly differently to the above method, and uses more fabric and has a few more seams. Encapsulated inside are small confetti hearts - score! using some of my craft stash too! :)

Once you have your bows finished, there is many different fun things you can do! Here are some things I have done with my bows:


Here I have sewn a hair clip to the back, with a matching gold thread. This makes a perfect hair accessory!


In this instance, I have made a bow that matches my crazy custom-made jacket, and attached a pin to the back ... Perfect for when I do balloon twisting events, or when I want to brighten up an otherwise average outfit!


Lastly, the above is a bathing suit top, the reason I need and made the bows! It features four of the golden bows. It was for an anime-themed visit to the local water park. I was a bit pressed for time, so all of the bows are secured on with safety pins. They all managed to stay on despite about 6 trips down the water slides!

I hope you have as much fun as I do creating these bows. All the fun is in seeing the rewards of your easy work and using fabrics out of your stashes! I think the next logical thing to make would be to put a bow onto a headband...

If you use this tutorial at all to make some bows, leave a comment or a link to them because I would love to see them! I hope it is all straight-forward, but if you need any help or have questions, please do not hesitate to ask!


Bonus out-take pictures... Mousecat and Blue delaying the creative process! Gotta love my little girls...

More the Merrier Monday


Tuesday, January 8, 2013

Creating my Costume - Daenerys Qartheen Gown

When I first set out to make a costume, I do a lot of Internet research (that is a lot of Facebook interspersed with Google searches) - namely looking at pictures of the original costume and the interpretations of other costumers who have recreated that particular costume. My intention is to do the best reproduction I possibly can, and I believe by reading the experiences of others and looking at their creations helps form my ideas and shapes my plan of attack to the costume.

With that philosophy in mind, I would like to share with you my process for recreating my Daenerys costume from HBO's Game of Thrones.

Warning!
If you are looking for me to tell you how I made the belt and shoulders... I'm sorry but I can tell you how I made them... Because I didn't make them ;)

You are welcome to ask me where I obtained them and I am more than happy to share my creative friend's contact email if you wish to contact him yourself.
What I will be able to show you however is how I attached the shoulders to my costume :)

Let's Start with the Dress Design...
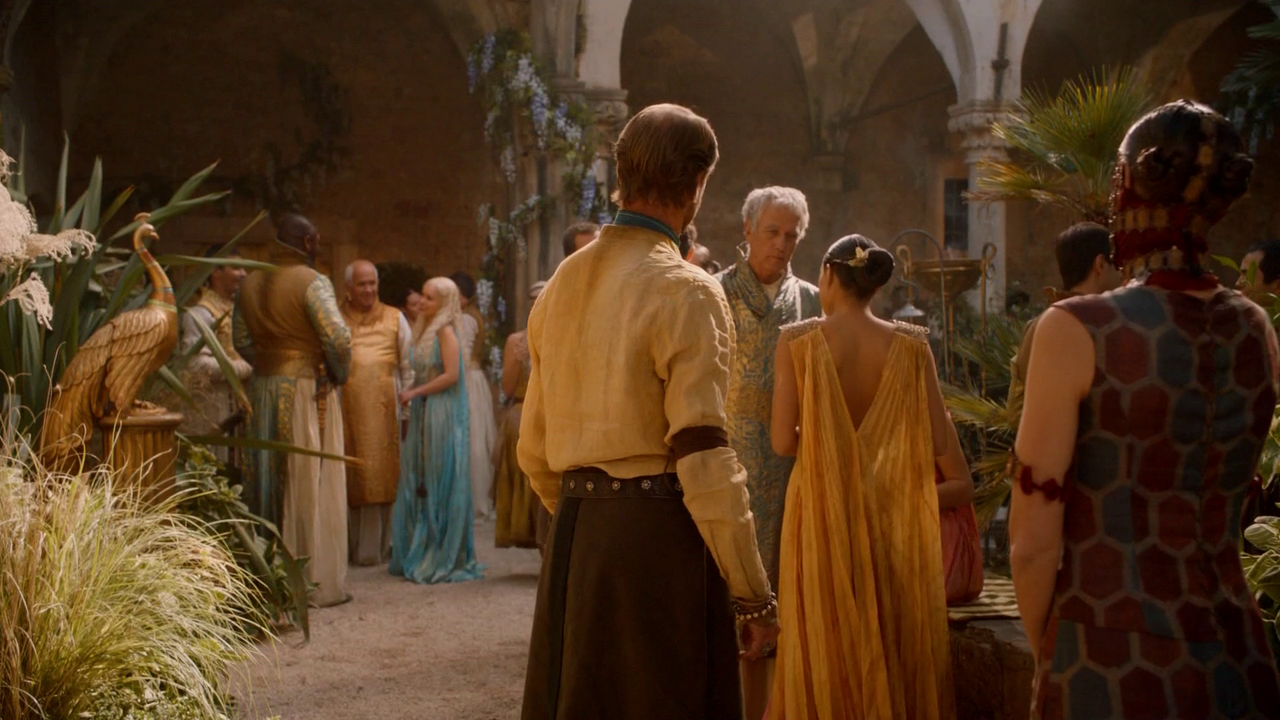
First of all, from studying the dress Daenerys wore in Qarth; I determined how her dress goes together. It is actually a very simple yet very effective design. It did take me a while to get my head around it, and a few quick sketches in my drawing book I came up with this (and coloured it in Paint for your viewing pleasure): 


Let's break the above illustration down. On the left, it is a side view of the costume. The biggest things that we can see is that the front of the dress is not the same as the back. The front of the dress is attached to the golden shoulder pieces, but the back of the dress is quite low and the top of it sits at approximately the small of Daenerys's back. 

2ndly; it is the cape only that is attached at the back of the dress to the golden shoulder pieces, and this in turn is sewn into the side seams of the dress. It does not flow as a loose entity from the rest of the dress - it is attached.

Now if we turn our intention to the right, we see the back of the costume - the cape (admittedly there is not much to see). This was the intention of what I wanted to illustrate to myself with this sketch, however it could also represent what this dress would look like without the belt being worn - very billowy indeed! The belt is what cinches in the dress and gives it its feminine allure. the picture below gives you a bit of an idea of just how much fabric is there in the front!

Was testing for transparency when this picture was taken!

Let's Talk About Fabric...
On occasions I have received an email asking where I purchased my fabric. Here is an excerpt from one of the replies I have given:

This is the email I sent them:
I came across information that fabric from your company was used in the creation of a particular gown created by Michele Clapton for the use in the series Game of Thrones. More specifically, I understand it to be a blue silk chiffon with metallic thread. I hope that I am being specific enough. If necessary I can provide further information.
My query is I was wondering if the fabric was in stock; with the intent of purchasing approximately 5 meters.

Thank you kindly for your time and assistance! 


This was their response:
Thank you for your email. You are correct that is one of our fabrics. It is £25/m and a grey/blue with a silver metallic thread. Please find attached a photograph. It is currently in stock. 

On the invoice that they sent after the fabric arrived, it was called:
Blue/Silver Silk Chiffon


To help avoid repeating myself too much, read more in this post about what I did with this fabric to make it Daenerys-ready. It is important to note however that this fabric was actually lightened for use in the show, and the golden print is not on the dress, that is something you would also need to do to the fabric yourself.

PS I actually ended up ordering 6 meters of the fabric, not 5 such as in my email enquiry above.

As you would expect of a dress worthy of a Khaleesi, the fabric has a steep (but understandable for its quality) price tag attached at £25/m.

Today, whilst browsing in my local Spotlight, I came across the fabric below:


It comes in at a much more affordable price of $6.99/m. I believe that it is similar enough in colour to the fabric I used in making my dress. Of course you will still need to add the golden print to the dress, but I will definitely show you the process that I used and I will do so in a later blog post.

To close on this post, can you guess what this is for:...?


During my search for other people's creations of the Qartheen gown, I came across what I thought was a brilliant idea - as made by another fan. For her recreation of the dress, she used bracelets as the shoulder pieces. Such a fabulous idea that it got me to thinking...

From there I decided that I was going to make another version of this dress, but rather be inspired by than trying to do a reproduction. With this image in mind, I set out to find some bracelets that I could use as the shoulder pieces; and if I was truly lucky to be able to also make a matching belt from deconstructed bracelets (something I have never before attempted...). To my delight, there on sale in Lovisa was six of the bracelets above, at $5.00 each... A massive saving of $20 each. Just enough materials in there to de-construct (I think) to make the shoulders and belt!

The midnight blue fabric is what I have chosen for the fabric of the dress. The beads in the bracelets are an antique pearl and diamontes whilst the setting is antique silver/pewter in colour. The bracelets were purchased first, and the fabric was chosen to fit the style of the dress first and foremost - but also because the colours look great together!

So how does this benefit you? Well the answer is I will make this version of the dress and take photos along the way to show you how the original dress was made. The principals of construction will be the same, it will just be the outcome will look different to Daenerys's (of course ;)) On occasions, I will use pictures from my original construction of the dress so you can see how the process is identical. 

I may learn some new tricks on my 2nd go-round, which can also only be of benefit to others so you can learn from my mistakes ;) hehe Luckily, as I've mentioned earlier - the design is really simple so I'm sure we'll go just fine.

Until next time! (Whew, so feels like my longest post!)


Sunday, January 6, 2013

Photo Challenge = Accepted.

It is my intention to attempt the challenge of taking a photo a day for each and every day of the year. I may not be able to fulfill this challenge, however I want it to be something fun and allow me to reflect on the good times of 2013 :)

I will try not to double up where possible in other postings, and the pictures will be a combination of my iPhone and my DSLR. I hope things don't get too repetitive, so I will do my best to throw in as much variety as possible. After all, 365 days is a long time :S

Onto the pictures for the week!

1/01: Lake Alexander @ East Point

2/01: Sailor Moon costume I am working on

3/01: Batman balloon ordered by client

4/01: My Lime Crime eyeliners arrived (only took about 5 weeks! :P) 

5/01: My Mousecat!


6/01: I took Cheap Cheep to the beach/foreshore for an excursion 

So this helps me get the motivation to post at least once a week, and helps me to get a bit more creative with photography. Also it was a great excuse to soak up some atmosphere at the foreshore!

Oh, and why don't you check out my About Me page? I did a revamp today and after innumerable takes, I filmed a welcome video which may (or may not!) be a bit fun for you to watch. Don't let my efforts be in vain! ;)


Related Posts Plugin for WordPress, Blogger...